

Recently Pinterest has covered in different ideas for how to display your jewelry: a rake, a jewelry tree, a cake stand, you name it people show pictures of it. I found that most of those ideas didn’t give me enough versatility for displaying my necklaces or required expensive items. I opted to combine several different ideas to display my necklaces using relatively affordable and customizable items.
DIY Materials:
- Empty frame, painted the color of choice
- Cup hooks, spray painted the color of choice (like these from Amazon)
- Tracing paper or white tissue paper (the kind you put in a gift)
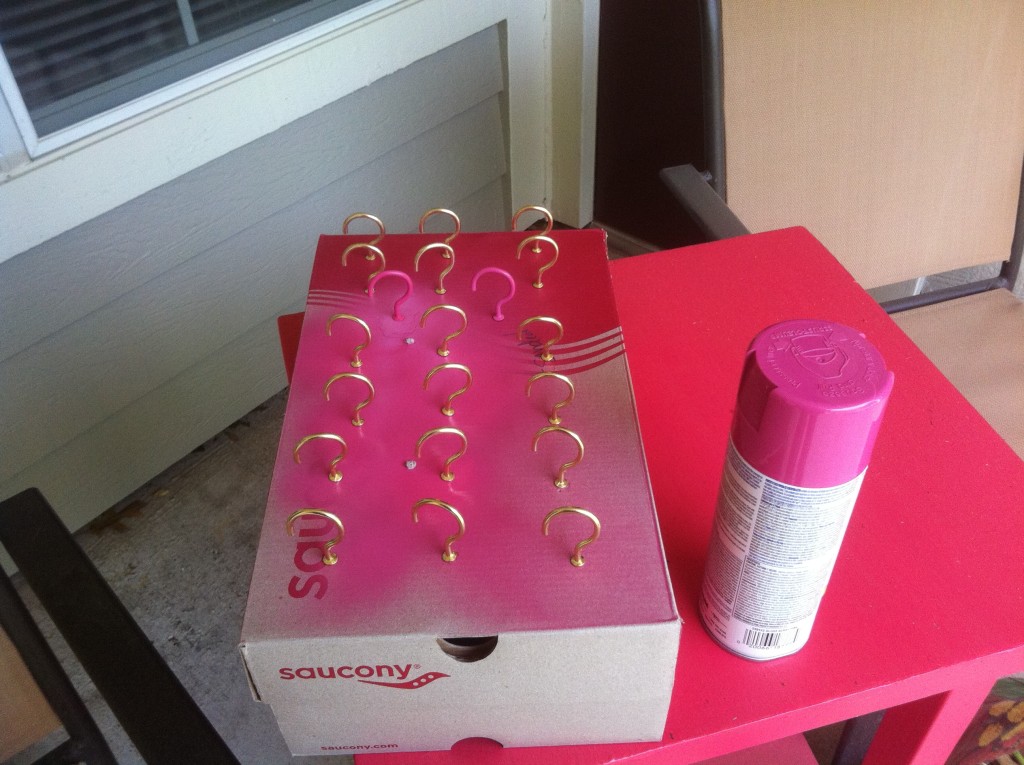
To paint the cup hooks I pushed them into the top of an old shoebox and then spray painted them on all sides. Try not to do this on a windy day; having to pick dead grass out of them was not a great time. I let them dry for about 48 hours before using, I am sure that was longer than needed.
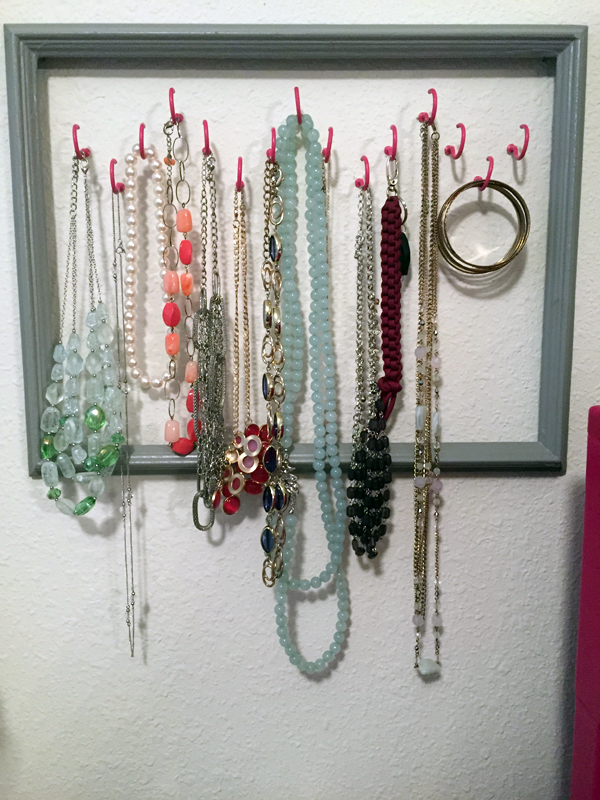
Once I got my frame and cup hooks painted I decided that I wanted a chevron pattern for the cups. I traced the pattern on to the tissue paper, with the hooks 3 per side and the peaks 5 inches apart. Then, I decided where I wanted the frame and put that up on the wall first. I tacked up the ends of the paper and then using a thumbtack put a mark where each hook would be by putting a small hole in the wall. My paper pattern wasn’t quite long enough so I would move it every few places and continue. Then I screwed in the hooks, it took forever and made a huge mess. I hung the frame around the hooks and then added my jewelry.

This is probably my favorite Pinterest project to date, I love that when I get ready in the morning I can see what I have and it makes it easy to change out my jewels everyday. I am much more likely to wear different jewelry everyday since it isn’t a tangled mess in a pile.